What is a variable?
A variable allows you to refer to a particular value through a selected name. Using variables is very comfortable because variables can be applied exactly in the same way as the values they refer to.
The value of the variable can be changed (it can get various values). The variable is also a way to refer to values which are not known in advance (during the code writing), for example: having started the GameBook, users enter their names, the results of various calculations or data modifications which have taken place along with the progress achieved by players in the GameBook.
Names of variables – the rules
- the name always starts with the
$character, for example:$score - please, remember that the name of a variable must be a single word. If you need several words to provide a proper description of the variable, you can do it as in the following examples:
$doorClosed,$door_open. Choose one style of notation and use it all the time. - names which differ only with the size of characters are different
Data types
| Type | Example | Code |
| Integer Integer number | 4 | (set: $points to 21) |
| Float Floating-point number | 2.5 | (set: $height to 1.85) |
| String String of characters | “red” | (set: $name to "Max") |
| Boolean Logical expression | true false | (set: $door_open to true) |
See more in documentation.
The (set: ) macro allows you to create a new variable or to modify an existing one (e.g. adding points). See more in documentation.
Create and displaying variable value
Example
(set: $name to "Max")
(set: $favourite_colour to "blue")
(set: $age to 12)
Hi $name, I’ve heard you like $favourite_colour and you are $age.
Result

Operators and variable modification
| Operator | Description |
| + | addition |
| – | subtraction |
| * | multiplication |
| / | division |
| % | modulo (remainder of a division) |
See more in documentation.
Example
(set: $weight_earth to 62)
(set: $weight_moon to $weight_earth / 6)
(set: $weight_jupiter to $weight_earth * 2.528)

Your weight on Earth is: $weight_earth kg.
- if you lost 10 kg your weight would be (print: $weight_earth - 10) kg.
---
Your weight on Moon would be: $weight_moon kg.
Your weight on Jupiter would be: $weight_jupiter kg.
Result

Scoring
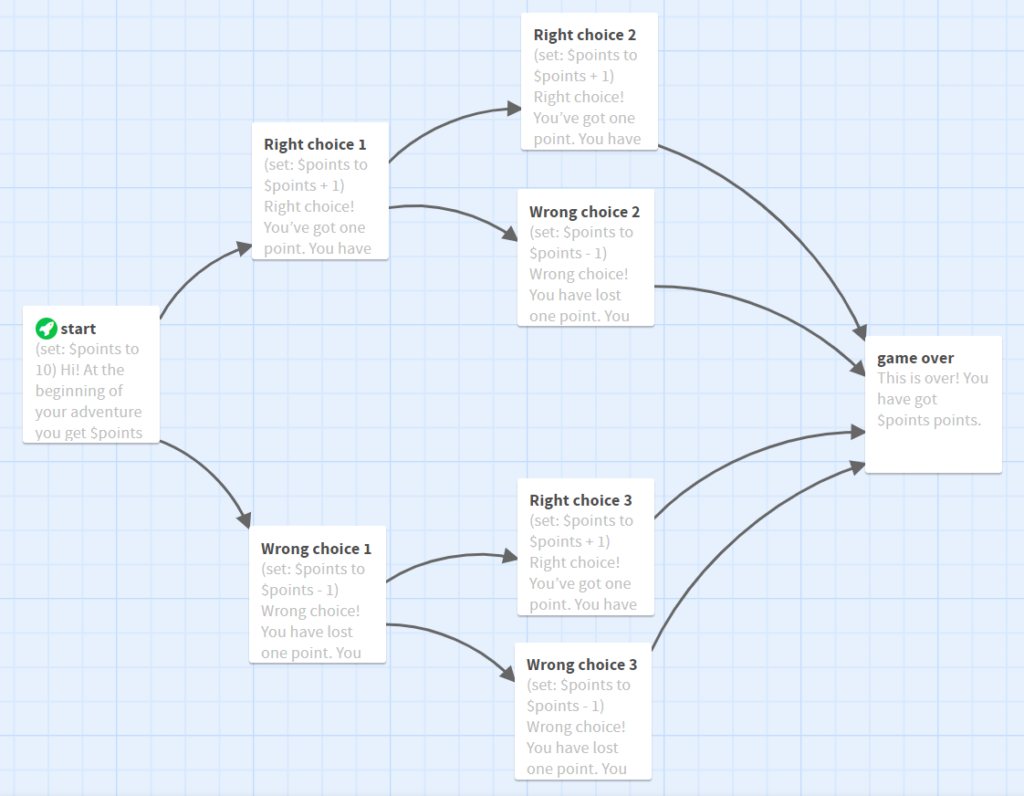
Here you will see how to introduce the scoring system into your GameBook (initial points, taking off and adding points, final score).
Start
(set: $points to 10)
Hi!
At the beginning of your adventure you get $points points.
While making decisions you can gain or lose points – beware!
---
[[Right choice 1]]
[[Wrong choice 1]]
Right choice
(set: $points to $points + 1)
Right choice! You’ve got one point. You have already got $points points.
---
[[Right choice 2]]
[[Wrong choice 2]]
Wrong choice
(set: $points to $points - 1)
Wrong choice! You have lost one point. You have got $points points.
---
[[Right choice 3]]
[[Wrong choice 3]]
Example – an editor view

You can test:
Disable back and repeat arrows
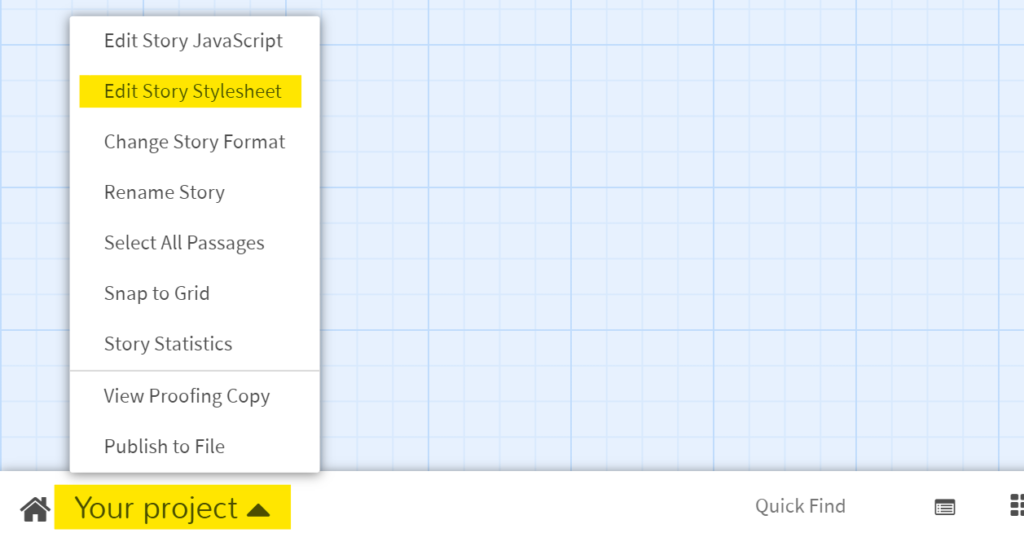
You should remember to disable the options of going back and repeating. In the project, you need to enter the “Edit Story Stylesheet” tab and to add the CSS rule. In this way the back and repeat arrows will be unavailable for players.
tw-sidebar {
    display: none;
}
Incrementing and decrementing
Instead of (set: $points to $points + 1)
you can use (set: $points to it + 1)
Instead of (set: $points to $points - 1)
you can use (set: $points to it - 1)
Good practice
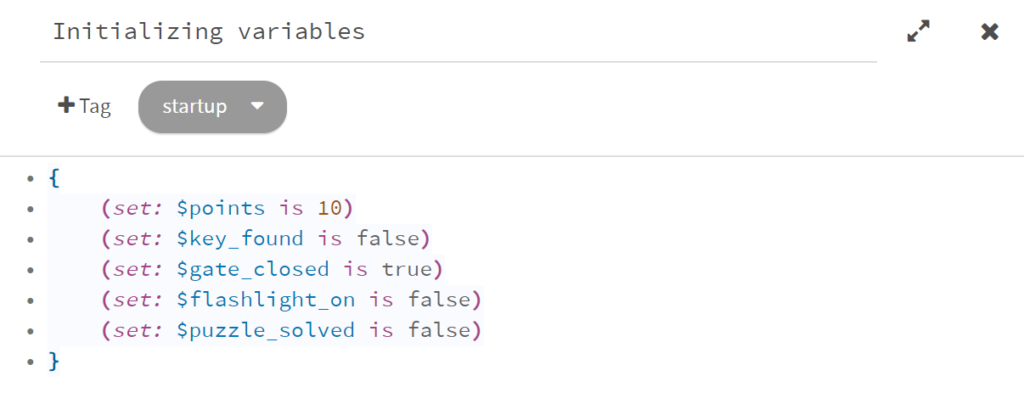
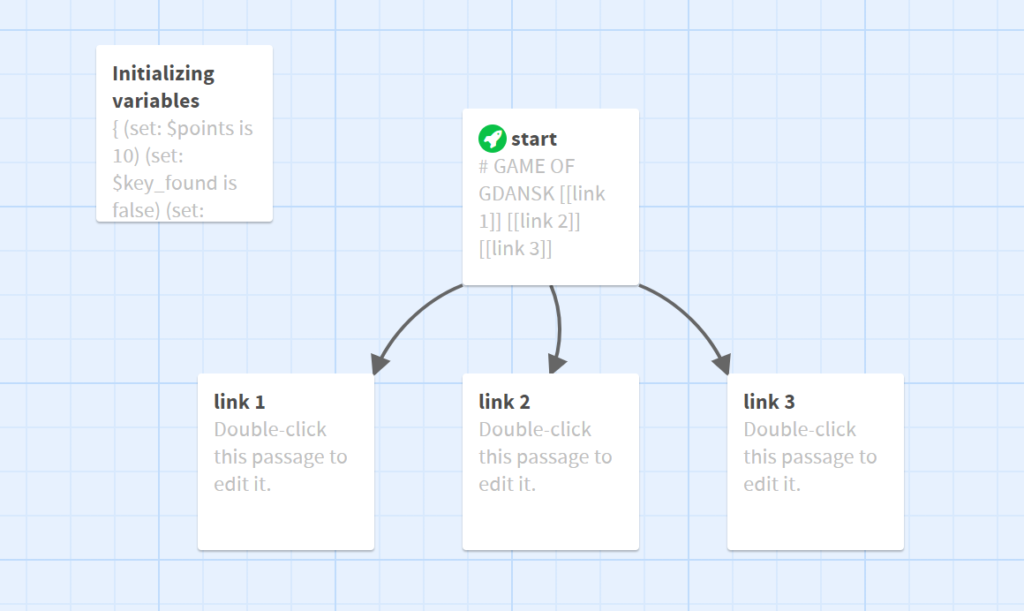
It is worth initiating your variables (giving the variables their initial values) on a special slip with the startup tag. In this way you can avoid various errors and increase clarity of the project. In other words, after the GameBook is started, variables will be created and after that they will be attributed with their values. See more about tags (e.g. header/footer) in documentation.
- Add a new slip (the green “Passage” button in the bottom right corner)
- Add a startup tag (the “+Tag” option – under the title of the slip)
- Initialize the variables


Variables may move the content down
Variables can act as an additional invisible top margin for the content of the slip. In order to avoid such an unwanted effect, you should apply variable “grouping”. Please note that I have done it in the example above: I have used {} characters and code indentation.
{
    code
    code
    code
    ...
}
See more in documentation.
Variables in styling
Temporary variable
You can use a temporary variable while working with text styling, however, you should remember that it exists only within the field of one particular slip (a fragment of the story). You can create it using the _ character instead of $ character at the beginning of names, for example: _points
(set: _ghost to (text-style: "outline"))

Text text text _ghost[Awoo].
_ghost[Ooooh].
Result

