Headers
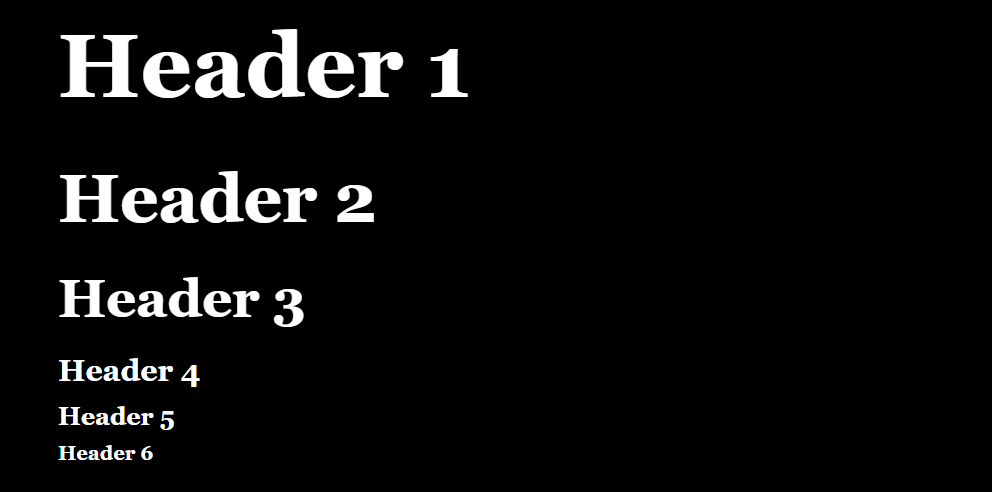
Headers are used to give proper significance (importance) to particular text parts. Usually they are also titles for a more specific content e.g. in books, headers can be chapter titles.
By default we can use 6 header levels (of importance). The header of the first level is the most important, and the header of the last level is the least important. We create headers by using a needed number of # signs e.g. the header of the third level is made by using 3 such signs: ###.
| Style | Code |
| Header of the 1st level | # Header text |
| Header of the 2nd level | ## Header text |
| Header of the 3rd level | ### Header text |
| Header of the 4th level | #### Header text |
| Header of the 5th level | ##### Header text |
| Header of the 6th level | ###### Header text |
Example
# Header 1
## Header 2
### Header 3
#### Header 4
##### Header 5
###### Header 6
Result

Lists
Example
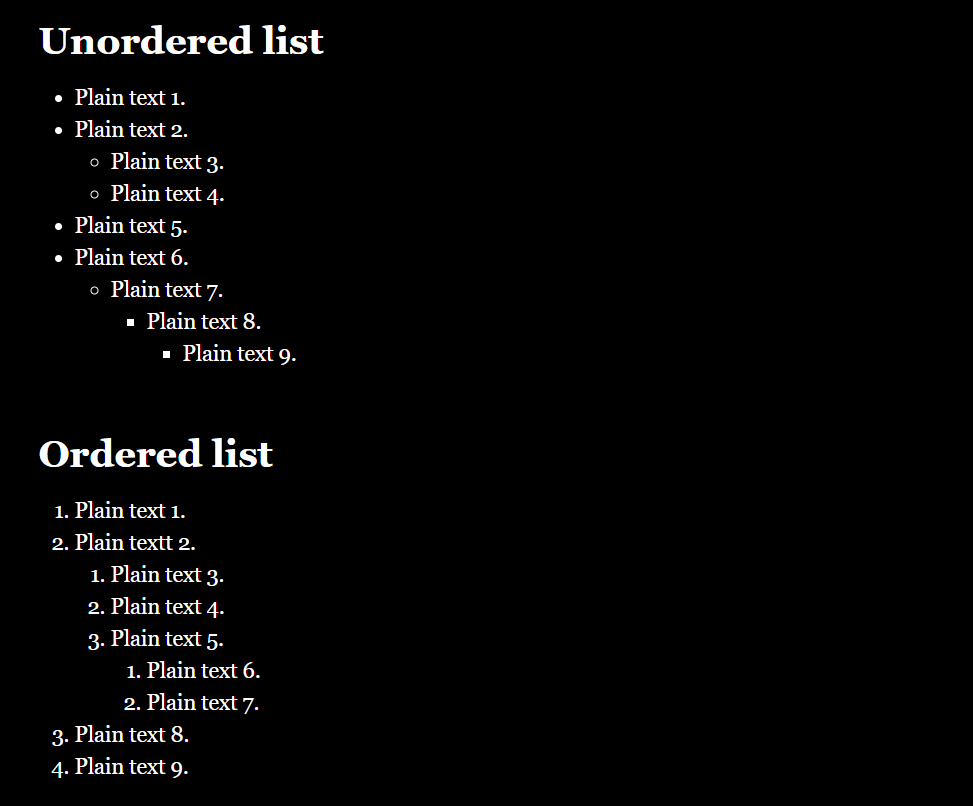
### Unordered list
* Plain text 1.
* Plain text 2.
** Plain text 3.
** Plain text 4.
* Plain text 5.
* Plain text 6.
** Plain text 7.
*** Plain text 8.
**** Plain text 9.

### Ordered list
0. Plain text 1.
0. Plain textt 2.
0.0. Plain text 3.
0.0. Plain text 4.
0.0. Plain text 5.
0.0.0. Plain text 6.
0.0.0. Plain text 7.
0. Plain text 8.
0. Plain text 9.
Result

Style markup
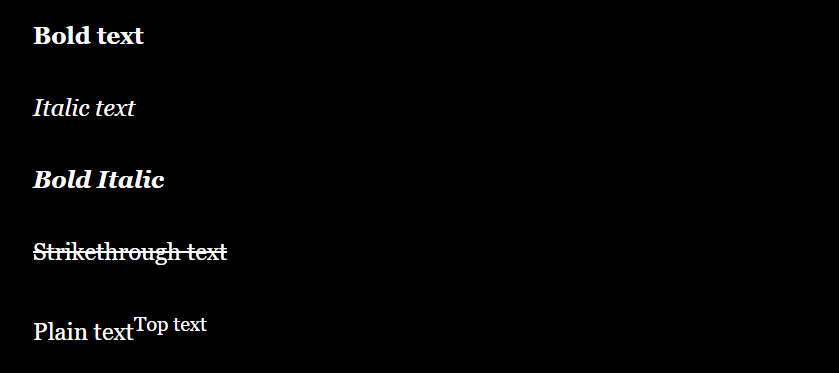
Style markup consists of special tags which change the appearance of a plain text in a specific way. Pay attention to the fact that you can combine them e.g. Bold Italic. In such a case, please, remember to write tags symmetrically – e.g. **//text//**.
| Styling | Markup code |
| Bold | **text** |
| Italic | //text// |
| Bold Italic | **//text//** |
| Strikethrough text | ~~text~~ |
| Superscript | 2^^10^^ |
Example
**Bold text**

//Italic text//

**//Bold Italic//**

~~Strikethrough text~~

Plain text^^Top text^^
Result

Text styles
Text styles can be made by using macros (text-style:), which gives us a bigger choice in comparison to that offered by style markup.
Example
1. none – (text-style: "none")[No way. Take me out of here!]

2. bold – (text-style: "bold")[No way. Take me out of here!]

3. italic – (text-style: "italic")[No way. Take me out of here!]

4. underline – (text-style: "underline")[No way. Take me out of here!]

5. strike – (text-style: "strike")[No way. Take me out of here!]

6. superscript – (text-style: "superscript")[No way. Take me out of here!]

7. subscript – (text-style: "subscript")[No way. Take me out of here!]

8. mark – (text-style: "mark")[No way. Take me out of here!]

9. outline – (text-style: "outline")[No way. Take me out of here!]

10. shadow – (text-style: "shadow")[No way. Take me out of here!]

11. emboss – (text-style: "emboss")[No way. Take me out of here!]

12. condense – (text-style: "condense")[No way. Take me out of here!]

13. expand – (text-style: "expand")[No way. Take me out of here!]

14. blur – (text-style: "blur")[No way. Take me out of here!]

15. blurrier – (text-style: "blurrier")[No way. Take me out of here!]

16. smear – (text-style: "smear")[No way. Take me out of here!]

17. mirror – (text-style: "mirror")[No way. Take me out of here!]

18. upside-down – (text-style: "upside-down")[No way. Take me out of here!]

19. blink – (text-style: "blink")[No way. Take me out of here!]

20. fade-in-out – (text-style: "fade-in-out")[No way. Take me out of here!]

21. rumble – (text-style: "rumble")[No way. Take me out of here!]

22. shudder – (text-style: "shudder")[No way. Take me out of here!]
Result
Text-colour macro
Macro (text-colour: yellow)[Yellow text] allows you to set the colour for a chosen text part.
Example 1
You can choose one of the colours defined in Harlowe manual:
| Colour’s Name | Colour’s Sample | Code |
| red | (text-colour: red)[Text] | |
| orange | | (text-colour: orange)[Text] |
| yellow | | (text-colour: yellow)[Text] |
| lime | | (text-colour: lime)[Text] |
| green | | (text-colour: green)[Text] |
| cyan | | (text-colour: cyan)[Text] |
| blue | | (text-colour: blue)[Text] |
| navy | | (text-colour: navy)[Text] |
| purple | | (text-colour: purple)[Text] |
| magenta | | (text-colour: magenta)[Text] |
| white | | (text-colour: white)[Text] |
| black | | (text-colour: black)[Text] |
| grey | | (text-colour: grey)[Text] |
Result 1

Example 2
You can use hexadecimal RGB colour scheme.
(colour: #e61919)[Red text]
(colour: #197fe6)[Blue text]
(colour: #e5e619)[Yellow text]
Use the tool for colour selection.
Result 2

Text background macro
Macro (background: ) is similarily used as the text-colour macro.
Example 1
(background: red)[Red background]
(background: #35E415)[Green background]
Result 1

Example 2
(background: (gradient: 90, 0.1, blue, 0.2, red, 0.3, orange, 0.6, yellow))[Text text text text.]

angle: 90 degrees
section 1: 10% blue
section 2: 20% red
section 3: 30% orange
section 4: 60% yellow
We indicate a point from 0 to 1 where a given colour appears – 0 at the beginning and 1 at the end. Values 0.1, 0.2, 0.3, 0.6, 1 can be interpreted as 10%, 20%, 30%, 60%, 100%.

Result 2
![Twine - the result (background: (gradient: 90, 0.1, blue, 0.2, red, 0.3, orange, 0.6, yellow))[Text text text text.]
angle: 90 degrees
section 1: 10% blue
section 2: 20% red
section 3: 30% orange
section 4: 60% yellow](https://accessible.gameofgdansk.eu/wp-content/uploads/2021/09/gradient.png)
Markup horizontal-rule
Horizontal line markup --- is used to place a horizontal line as a separator in a part of the story, for example, to separate one part of the text from the other.
Example
It’s time – Max says to you. There are lots of thoughts running through your head.
You are wondering whether you really want to do it. A parachute jump has always
been a challenge to you.
---
What to do - [[jump]] or [[retreat]]?
Result
![Twine - the result. It’s time – Max says to you. There are lots of thoughts running through your head.
You are wondering whether you really want to do it. A parachute jump has always
been a challenge to you.
---
What to do - [[jump]] or [[retreat]]? Plain text is white, decisions are blue, the background is black.](https://accessible.gameofgdansk.eu/wp-content/uploads/2021/09/example-7-result-1024x212.png)
Text-rotate macro
Macro (text-rotate: ) allows you to rotate the text according to a given angle (expressed in degrees). The rotational axis is placed in the middle of the rotated text.
Example
(text-rotate: 12)[It’s time] – Max says to you. There are lots of thoughts
running through your head.You are wondering whether you really want to do it.
A parachute jump has always been a challenge to you.
Result
![Twine - the result. (text-rotate: 12)[It’s time] – Max says to you. There are lots of thoughts
running through your head.You are wondering whether you really want to do it.
A parachute jump has always been a challenge to you.](https://accessible.gameofgdansk.eu/wp-content/uploads/2021/09/example-8-result-1024x258.png)
Macro (hover-style: )
Use (hover-style: ) macro if you want to apply a specific style when a player mouses over a chosen text part.
Plain text 1.

(hover-style: (text-color: red))[Plain text 2.]

(hover-style: (text-color: blue) + (text-rotate: 15))[Plain text 3.]

(hover-style: (text-color: yellow) + (text-style: "shudder"))[Plain text 4.]
Result – you can test:
Link to a hidden text with a style
If you wanted to create the link to the text hidden within the same part of the story and the text had a chosen style applied to, you have to combine macros (link: ), (text-color: ), (text-style: ).
You were about to jump when, at the very last moment, you realised that you had forgotten something.

(link: "What was it...")[(text-color: yellow) + (text-style: "shudder")[You had forgotten to bring your favourite protective goggles with you!]]
Result – you can test:
